|
|
| Line 2: |
Line 2: |
| | | show_payments_admin_section = true | | | show_payments_admin_section = true |
| | }} | | }} |
| − |
| |
| − | [[Offerit]] gives you the option to create your own [[Pay Via Types]] for use with compatible payment options. This allows you to choose different methods of sending [[Ct#Affiliate|affiliate]] payments, as well as the option of configuring PayVia options how you want.
| |
| − |
| |
| − | [[File:Admin_Pay_Via_Types.png|750px|List of PayVia Types]]
| |
| − |
| |
| − | == Creating A PayVia Type ==
| |
| − | To create a new [[Pay Via Types|PayVia type]], click on the "PayVia Types" tab on the side of the page in the [[Payments Admin]]. On the next page, scroll down to the bottom, enter a name into the "New PayVia Option" text box at the bottom, and click "Add".
| |
| − |
| |
| − | [[File:Admin_New_Pay_Via_Type.png|Adding a New PayVia Type]]
| |
| − |
| |
| − | You will then be prompted to fill out a set of required fields:
| |
| − | * '''Pay Via Type''' - The name of your new PayVia type.
| |
| − | * '''Description''' - The description of the PayVia type that your affiliates will see.
| |
| − | * '''Minimum Payment''' - A comma-separated list of available payment options that affiliates can select from.
| |
| − | * '''Cost/Bonus Per Payment''' - Allows you to set a fee to charge affiliates per payment sent, or add a bonus to affiliate payments. You can set it to zero to disable any costs, set it to positive to charge affiliates, or set it to negative to give affiliates a bonus on each payment.
| |
| − | * '''Dump Format''' - Choose an appropriate dump format to use. For more information, please see the [[Creating and Editing PayVia Options and Dump Formats#Pay Via Dump Formats|Pay Via Dump Formats]] section of this article.
| |
| − | *'''Enabled Default Rule''' - This is the default rule setup for each Pay Via type.
| |
| − | **Enabled: All affiliates are able to choose this payment method, unless there is a specific disable rule setup in the Pay Via Rules.
| |
| − | **Disabled: None of your affiliates will be able to utilize this payment method, unless they match an enable rule setup in the Pay Via Rules.
| |
| − |
| |
| − | After configuring all available fields, click Save to save your changes. You can edit this information at any time with the pencil icon.
| |
| − |
| |
| − | === Editing Pay Via Fields ===
| |
| − | To edit the fields of your new PayVia option, click the "Configure" icon under the Actions column. This option is only available for the payvia types you have created yourself - the default options can not be edited in this way. The next page allows you to edit the [[Pay Via Types|PayVia type]]'s structure, as well as available fields. You can add a new field to the structure by filling out a new row and clicking Save.
| |
| − |
| |
| − | [[File:Admin_New_Pay_Via_Fields.png|750px|PayVia Fields]]
| |
| − |
| |
| − | * '''Name''': The name of the field as shown to affiliates (ex: ePassporte ID, user ID, etc.)
| |
| − | * '''Type''': Choose to display a text box or a multiple choice selection
| |
| − | * '''Required''': Whether or not the field is a required field (ex: for the ePassporte ID, if it's not required, how would you pay them?)
| |
| − | * '''Minimum''': The minimum character length for the field (ex: 1)
| |
| − | * '''Maximum''': The maximum character length of the field (ex: 16)
| |
| − | * '''Unique''': Prevents multiple affiliates from using the same value for this field
| |
| − | * '''Check Function''': Validates input using this function. Use NONE to disable validation. (ex: alnum_space_check makes sure the input is alphanumeric characters and allows spaces.)
| |
| − |
| |
| − | The four Action icons next to a field let you edit, disable/enable, or change the order the options appear on the affiliate's sign-up form.
| |
| | | | |
| | == Pay Via Dump Formats == | | == Pay Via Dump Formats == |
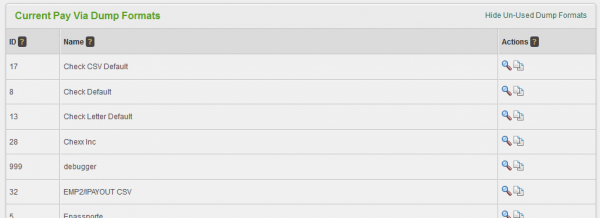
Dump formats are used to format and display your payment after they've been stored. To view your dump formats, go to Payments Admin and click the "Dump Formats" tab to view the current available dump formats.
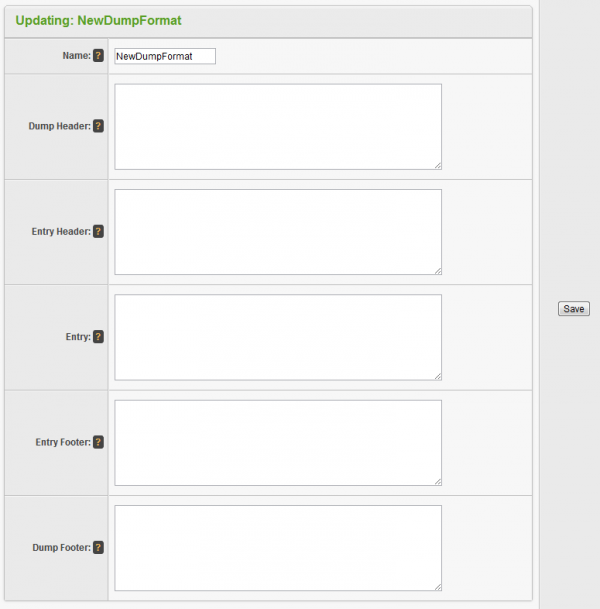
You can create a dump format by typing in the name under "New Dump Format". Dump formats have the following sections:
All the fields that you created in the PayVia form are available here, but with different names. Starting with the name you gave the field, the name is:
The easiest way to create your own dump format is to duplicate a similar format and then make the necessary changes. Offerit currently ships with more than 20 formats, so finding a similar format should be easy.

