Difference between revisions of "Edit CSS Colors"
OfferitMegan (talk | contribs) (→) |
OfferitMegan (talk | contribs) m (→Favicon Icon) |
||
| (27 intermediate revisions by the same user not shown) | |||
| Line 1: | Line 1: | ||
| − | With the CSS color editor, you can change the look and feel of the affiliate side of your network. | + | {{Offerit Manual |
| + | | show_setup_section = true | ||
| + | | show_configuration_admin_section = true | ||
| + | }} | ||
| + | |||
| + | With the CSS color editor, you can change the look and feel of the affiliate side of your network. There are an endless number of colors available for you to customize, and to view them all, click "Show Advanced Settings". You can also upload your logo, which affiliates will see in the top left hand corner of every page. | ||
| + | |||
| + | [[File:AdminTabCSS.png|900px]] | ||
| + | |||
| + | |||
| + | == Customizing CSS Colors == | ||
| + | |||
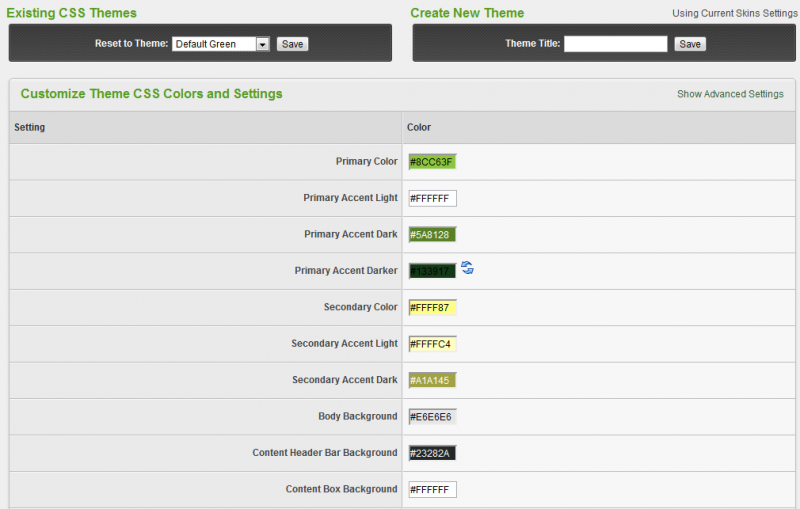
| + | We have picked out the ten most prominent colors for you to customize. After you have changed a color, you will notice blue arrow icons appear next to that color. With this icon, you can revert your changes back to the default color. | ||
[[File:Edit CSS Colors.png|800px]] | [[File:Edit CSS Colors.png|800px]] | ||
| − | + | === Primary Color === | |
| − | |||
| − | == Primary Color == | ||
Changes the main admin tabs. | Changes the main admin tabs. | ||
| Line 11: | Line 21: | ||
[[File:Primary Color.png]] | [[File:Primary Color.png]] | ||
| − | == Primary Accent Light == | + | === Primary Accent Light === |
Changes the tab description color. | Changes the tab description color. | ||
| Line 17: | Line 27: | ||
[[File:PrimaryAccentLight.png]] | [[File:PrimaryAccentLight.png]] | ||
| − | == Primary Accent Dark == | + | === Primary Accent Dark === |
Changes the drop down menu highlighting. | Changes the drop down menu highlighting. | ||
| Line 23: | Line 33: | ||
[[File:Primary Accent Dark.png|600px]] | [[File:Primary Accent Dark.png|600px]] | ||
| − | == Primary Accent Darker == | + | === Primary Accent Darker === |
Changes the highlighted links color. | Changes the highlighted links color. | ||
| Line 29: | Line 39: | ||
[[File:Primary Accent Darker.png]] | [[File:Primary Accent Darker.png]] | ||
| − | == Secondary Color == | + | === Secondary Color === |
Changes the highlighted link color of bubbled text. | Changes the highlighted link color of bubbled text. | ||
| Line 38: | Line 48: | ||
[[File:Secondary Color2.png]] | [[File:Secondary Color2.png]] | ||
| − | == Secondary Accent Light == | + | === Secondary Accent Light === |
Changes the color of the large tooltips, when the black question mark is moused over. | Changes the color of the large tooltips, when the black question mark is moused over. | ||
| − | [[File:Secondary Accent Light.png]] | + | [[File:Secondary Accent Light.png|500px]] |
| − | |||
| − | == Secondary Accent Dark == | + | === Secondary Accent Dark === |
Changes the borders around the help boxes and tooltips. | Changes the borders around the help boxes and tooltips. | ||
| − | [[File:Secondary Accent Dark.png]] | + | [[File:Secondary Accent Dark.png|500px]] |
| − | == Body Background == | + | === Body Background === |
Changes the entire background color. | Changes the entire background color. | ||
| − | [[File:Body Background.png]] | + | [[File:Body Background.png|500px]] |
| + | |||
| + | === Content Header Bar Background === | ||
| + | |||
| + | Changes the main header color of all modules. | ||
| + | |||
| + | [[File:Content Header Bar Background.png]] | ||
| + | |||
| + | === Content Box Background === | ||
| + | |||
| + | Changes the module background color. | ||
| + | |||
| + | [[File:Content Box Background.png]] | ||
| + | |||
| + | ---- | ||
| + | |||
| + | [http://wiki.offerit.com/index.php/File:CustomizationExample.png Here] you can view an example of a custom skin design. | ||
| + | |||
| + | == Header Logo Upload == | ||
| + | |||
| + | Not only can you alter the color theme of your affiliate skins in [[Offerit]], you can also easily upload a new Header Logo to be used on your affiliate pages. If your desired logo image is hosted remotely, just copy and paste the URL where your image is stored. If you need to upload your desired image to the [[Offerit]] server, click the "Choose File" button to select an image to be uploaded from your hard drive. Regarding the size of your new logo, an image sized 300-350px x 100px will work best. Your new Header Logo then will be displayed on every affiliate page once you save your CSS settings. | ||
| + | |||
| + | [[File:YourLogoHere.png|650px]] | ||
| + | |||
| + | == Body Background Image == | ||
| + | |||
| + | The Body Background Image allows you to upload or insert a background image to be used on all of the affiliate pages in [[Offerit]]. Although the other settings on this page (colors and header logo) are required, this setting is optional, as you do not ''need'' to use a body background image on any of your affiliate pages. | ||
| + | Uploading a Body Background Image is similar to uploading a Header Logo - If your desired body background image is hosted remotely, just copy and paste the URL where your image is stored. If you need to upload your desired image to the [[Offerit]] server, click the "Choose File" button to select an image to be uploaded from your hard drive. | ||
| + | |||
| + | Once you save your CSS settings, your new Body Background Image will be displayed in the background of the body text for every affiliate page in that skin. | ||
| + | |||
| + | == Favicon Icon == | ||
| + | |||
| + | Favicons made easy! A favicon, or "Favorite Icon," is a small icon that represents your Network. The favicon can appear directly in front of your website url in your browser's address bar, in the tab before the page title, or both. The visitor's browser determines where exactly the favicon images will appear. Favicons are useful not only for consistent branding, but for users who have multiple tabs open within a browser. Your favicon image is a quick tell to which tab your Network is in. | ||
| + | |||
| + | [[File:Favicon2.png|Favicons in Chrome]] | ||
| + | |||
| + | Don't have your own favicon yet? There are lots of free [http://www.favicon.cc favicon generators] on the web you can use to make an icon or just test ideas. But don't worry, Offerit already has the Offerit logo set as a favicon by default, and it is only optional to add your own. | ||
| + | |||
| + | The ideal size for your favicon image is 16x16 pixels. While Offerit will resize any image to 16x16px, the aspect ratio is not preserved. Also, resizing tends to make the favicon look less crisp. For example: | ||
| + | |||
| + | [[File:Favicon3.png|Favicons in Firefox]] | ||
| + | |||
| + | The '''+P''' icon was 16x16 pixels, while the '''+$''' icon was resized. | ||
| + | |||
| + | == Saving Your Skin == | ||
| + | |||
| + | Not only can you edit any of the colors and images that are used in your affiliate skins, you can save your custom CSS color schemes with the "Create New Theme" section on the CSS Colors page. To begin creating your new theme, set all of the colors and images that you want to save, using the instructions provided above. Once you've chosen the colors and images that you want to save to your new theme, locate the "Create New Theme" section on the top-right of the page. | ||
| + | Fill in the name you want to use for your new CSS Theme in the "Theme Title" field here, and click Save. Your new theme will now be saved for easy use on your [[Offerit]] install. | ||
| + | |||
| + | === Applying Your CSS Themes === | ||
| + | |||
| + | Choose the CSS Theme you want to apply to your skin with the "Reset to Theme" drop-down menu at the top-left of this page. Once you've chosen your desired CSS Theme, click Save to apply your theme's CSS color settings and logos to your chosen skin. | ||
Latest revision as of 11:04, 18 July 2013
With the CSS color editor, you can change the look and feel of the affiliate side of your network. There are an endless number of colors available for you to customize, and to view them all, click "Show Advanced Settings". You can also upload your logo, which affiliates will see in the top left hand corner of every page.
Contents
Customizing CSS Colors
We have picked out the ten most prominent colors for you to customize. After you have changed a color, you will notice blue arrow icons appear next to that color. With this icon, you can revert your changes back to the default color.
Primary Color
Changes the main admin tabs.
Primary Accent Light
Changes the tab description color.
Primary Accent Dark
Changes the drop down menu highlighting.
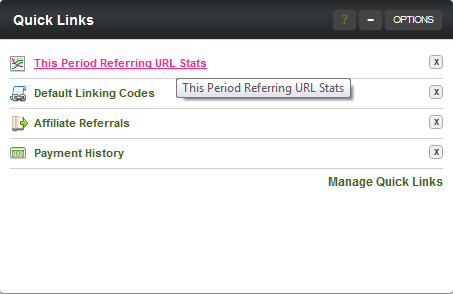
Primary Accent Darker
Changes the highlighted links color.
Secondary Color
Changes the highlighted link color of bubbled text.
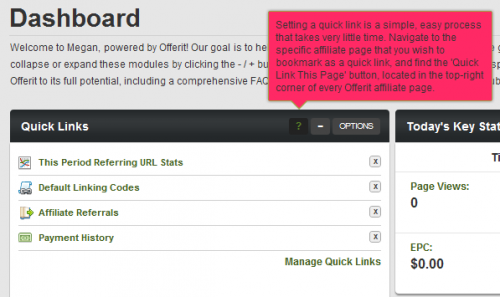
Secondary Accent Light
Changes the color of the large tooltips, when the black question mark is moused over.
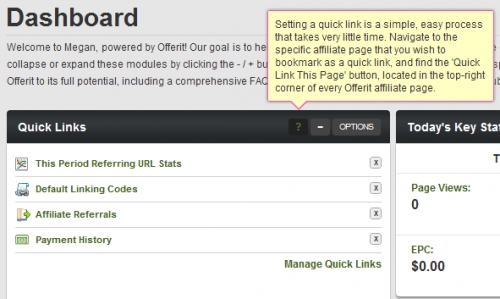
Secondary Accent Dark
Changes the borders around the help boxes and tooltips.
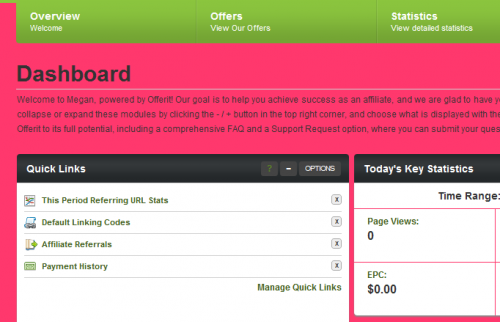
Body Background
Changes the entire background color.
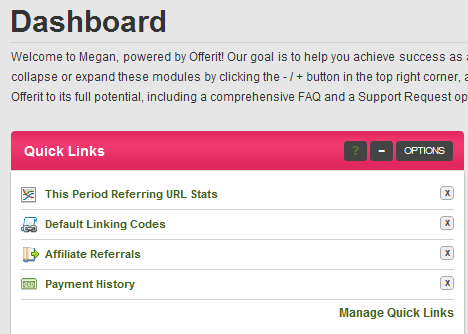
Content Header Bar Background
Changes the main header color of all modules.
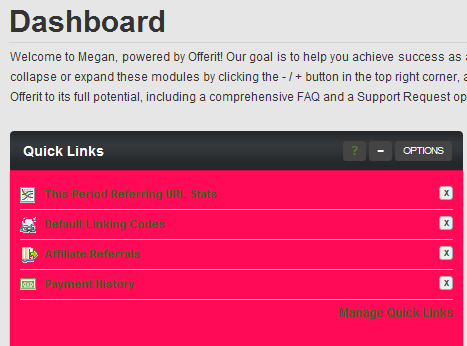
Content Box Background
Changes the module background color.
Here you can view an example of a custom skin design.
Header Logo Upload
Not only can you alter the color theme of your affiliate skins in Offerit, you can also easily upload a new Header Logo to be used on your affiliate pages. If your desired logo image is hosted remotely, just copy and paste the URL where your image is stored. If you need to upload your desired image to the Offerit server, click the "Choose File" button to select an image to be uploaded from your hard drive. Regarding the size of your new logo, an image sized 300-350px x 100px will work best. Your new Header Logo then will be displayed on every affiliate page once you save your CSS settings.
Body Background Image
The Body Background Image allows you to upload or insert a background image to be used on all of the affiliate pages in Offerit. Although the other settings on this page (colors and header logo) are required, this setting is optional, as you do not need to use a body background image on any of your affiliate pages. Uploading a Body Background Image is similar to uploading a Header Logo - If your desired body background image is hosted remotely, just copy and paste the URL where your image is stored. If you need to upload your desired image to the Offerit server, click the "Choose File" button to select an image to be uploaded from your hard drive.
Once you save your CSS settings, your new Body Background Image will be displayed in the background of the body text for every affiliate page in that skin.
Favicon Icon
Favicons made easy! A favicon, or "Favorite Icon," is a small icon that represents your Network. The favicon can appear directly in front of your website url in your browser's address bar, in the tab before the page title, or both. The visitor's browser determines where exactly the favicon images will appear. Favicons are useful not only for consistent branding, but for users who have multiple tabs open within a browser. Your favicon image is a quick tell to which tab your Network is in.
Don't have your own favicon yet? There are lots of free favicon generators on the web you can use to make an icon or just test ideas. But don't worry, Offerit already has the Offerit logo set as a favicon by default, and it is only optional to add your own.
The ideal size for your favicon image is 16x16 pixels. While Offerit will resize any image to 16x16px, the aspect ratio is not preserved. Also, resizing tends to make the favicon look less crisp. For example:
The +P icon was 16x16 pixels, while the +$ icon was resized.
Saving Your Skin
Not only can you edit any of the colors and images that are used in your affiliate skins, you can save your custom CSS color schemes with the "Create New Theme" section on the CSS Colors page. To begin creating your new theme, set all of the colors and images that you want to save, using the instructions provided above. Once you've chosen the colors and images that you want to save to your new theme, locate the "Create New Theme" section on the top-right of the page. Fill in the name you want to use for your new CSS Theme in the "Theme Title" field here, and click Save. Your new theme will now be saved for easy use on your Offerit install.
Applying Your CSS Themes
Choose the CSS Theme you want to apply to your skin with the "Reset to Theme" drop-down menu at the top-left of this page. Once you've chosen your desired CSS Theme, click Save to apply your theme's CSS color settings and logos to your chosen skin.

