Offer Setup
Contents
Basic Setup
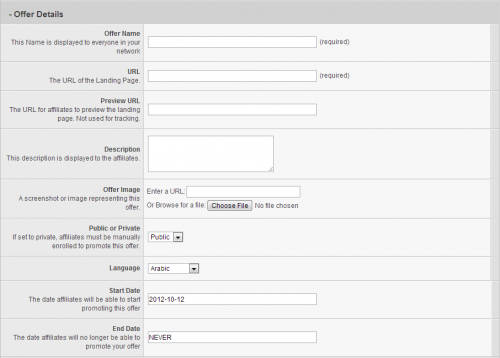
Adding an offer and a default landing page for that offer is a one-step process in Offerit. To set up a basic offer in Offerit, go to the Offers Admin and click the Add Offer tab.
You will see many fields available, both required and optional. The required fields are as follows:
- Offer Name - The name of your offer.
- URL - the URL for your offer (also known as the landing page)
Optional fields include:
- Description - A description of your offer, seen by affiliates on the offer details page.
- Offer Image - A screenshot or image representing this offer, shown to affiliates when browsing your offers.
- Public or Private - If set to private, affiliates must be manually enrolled to promote this offer. Public allows all affiliates to promote the offer.
- Language - Record the language your offer is written in. This helps affiliates find offers they can promote, and where to promote it.
- Offer Launch - The date that this offer is live and available to affiliates. Can be expressed as a Freeform Date. Default value is the day you created the offer.
- Offer Expire - The latest day this offer will be available to affiliates. Can be expressed as a Freeform Date. Default value is NEVER.
Tracking Details
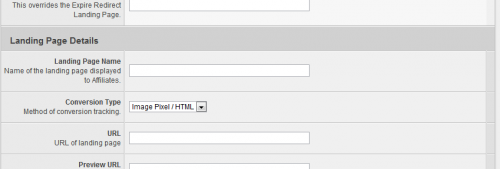
After entering in details related to the offer, you will see options for setting up Tracking Details.
Required fields are:
- Conversion Type - The method of conversion tracking for the offer.
- Tracking Domain - Specifies the domain to use for linkcodes.
Commission Details
After creating your default landing page, the next heading is Commission Details. Here you will need to enter information for how your affiliates will be paid for this offer.
- View - Payout Amount (in $) for each Page View.
- Unique - Payout Amount (in $) for each Unique Visitor
- Qual - Payout Amount for Qualified Hits
- $ Sale - Payout Amount for Customer Sale
- $ Continuity - Payout Amount for Customer Continuity
- % Sale - Payout Percentage for Customer Sale
- % Continuity - Payout Percentage for Customer Continuity
- CPM - Payout Amount per 1,000 Impressions
Leaving a field blank will set it as 0.
Advanced Setup
The above instructions contain the basic information necessary to get your offers and landing pages running and functional. However, Offerit provides a great deal of additional settings to further configure your landing pages.
Authorized Countries
Offerit lets you to exclude countries that are allowed to promote your offers using this "Authorized Countries" feature. To disallow a country, select it in the list of Authorized countries and click the ">>" button to move it to the list of Unauthorized countries. You can select multiple countries at once by holding the "ctrl" key while clicking on each country. Likewise, you can allow an offer for a country by selecting it in the list of unauthorized countries and clicking the "<<" button.
Language & GeoIP Targeting
These settings allow you to restrict access to your offer for visitors from specified countries. Offerit detects visitor countries through the visitor's default browser language.
The "Language" field to select a language for this landing page. The "Alternative URL" field lets you set a URL to automatically redirect visitors to if they do not meet your specified Language criteria.
Both of these settings are optional, and not necessary in order for your landing page to function. If you leave "Alternative URL" blank, all users will be able to access this landing page, regardless of browser language.
Categories
You can group your offers into different categories, allowing you or your affiliates to organize your offers. This will allow affiliates to select an offer category in the affiliate area - for example, if they only wanted to get linkcodes for certain offer categories. All of your categories will show here with a checkbox, simply check all that apply. If you have no offer categories, the field will be blank. To add an offer Category, go to the Offers Admin then click on "Categories" on the side navigation bar.
Marketing Types
You can also organize your offers by Marketing Type, which is simply an additional method to group your offers. Affiliates will be able to see which marketing types apply and don't apply for each offer they have access to. All of your marketing types will show here with a checkbox, simply check all that apply. If you have no marketing types, the field will be blank. You can add a new Marketing Type by going to the Offers Admin and clicking "Marketing Types" on the side navigation bar, and then clicking "Create a new Marketing Type". This will add a new marketing type to which you can add offers by clicking "List and Modify Enabled Offers".


